Monday, October 31, 2011

Scanography


1. Multiple Scans; Rexburg; 10/29/11 7:23 PM; Epson Scanner
2. Set up one shot scan; Rexburg; 10/29/11 7:23 PM; Epson Scanner

I used the scanners down in the lab.  I didn't edit them in anyway.  The only thing I did was try and use a higher resolution inorder to get a sharper image.  And I had the lots light so that the back ground would be dark.  I think the hardest part of this was scanning my face.  Especially whenever you up the resolution, it scans a lot slower so you have to sit then with your face on or close to the glass of the scanner.

Sunday, October 30, 2011

Edit


1.  Legion of Ghost; Rexburg 10/30/11 4:35 PM; f/5; 1/250; Focal Length 21; Canon t2i
2.  Darwin; Rexburg 10/30/11 4:45 PM; f/5; 1/125; Focal Length 18; Canon t2i
3.  Pac Man Love; Rexburg 10/30/11 5:01 PM; f/4; 1/125; Focal Length 18; Canon t2i

So I went out and shot these pictures of my friends.  These were their halloween costumes.  It was a perfect day for shooting.  But I used three different borders,  on the first image I used the burnt borders effect, then the flexible brushed on effect, and lastly I used the brushed on effect.  Not really much to say about them.  I just followed the directions in the book.

Monday, October 24, 2011

Bannack Best


1.  Blue Skies; Bannack 10/20/11 3:34 PM; F/9; 1/125; Focal Length 18; Iso 100; Canon t2i
2.  Hinge; Bannack 10/20/11 3:05; F/5.6; 1/150; Focal Length 32; Iso 200; Canon t2i
3.  Stairway Meade; Bannack 10/20/11 3:25 PM; F/5; 1/140; Focal Length 39; Iso 200; Canon t2i
4.  International Pickup; Bannack 10/20/11 4:34 PM; F/9; 1/40; Focal Length 18; Iso 100;
Canon t2i PM
5.  Jenni; Bannack 10/20/11 5:15 PM; F/4; 1/40; Focal Length 27; Iso 200; Canon t2i
6.  Bannack Pana; Bannack 10/20/11 3:44 PM; F/7.1; 1/200; Focal Length 27; Iso 100; Canon t2i, tripod
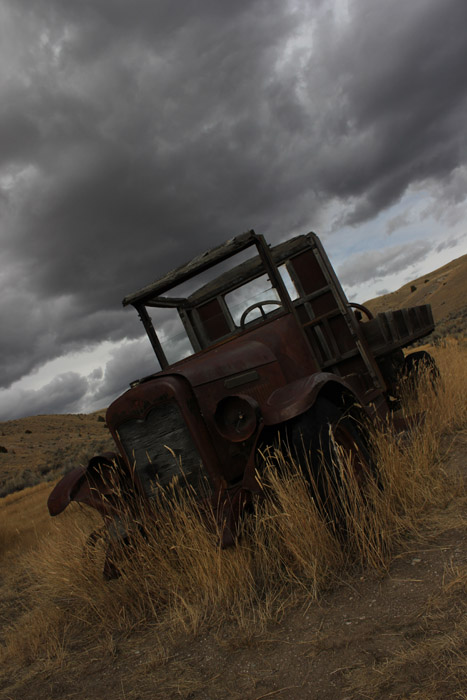
7.  Full International; Bannack 10/20/11 4:36 PM; F/9; 1/125; Focal Length 18; Iso 100; Canon t2i


So I have a couple more that I wanted to post but I thought these 8 photos would be enough.  For the Blue Skies picture I turned it into a black and white photo and had a green filter to it.  I really liked how much contrast the green filter gave the image.  And on all the other images besides the portrait of Jennilyn, I just bumped up the contrast and made the colors of the images more vibrate.  The pano image is straight out of the camera.  And the portrait I just air brushed her face so the skin tone would be a little more even, brighten up her eyes, and brought out the colors using the selective color layer.

Light Painting


1.  Chair; Bannack; 10/20/11 7:05 PM; F/6.3; 25 secs; Focal Length 21; Iso 400; Canon t2i, Shutter Release Cable, Polarizer filter, tripod
2.  Boots; Bannack; 10/20/11 6:55 PM; F/7.1; 1/25; Focal Length 27; Iso 400; Canon t2i; Shutter Release Cable, Polarizer filter, tripod

These were pretty interesting pictures.  I had a little color lights from everyones self timers so I just went in with the heal brush tool and took all those house and warmed up the color of the light so that it didn't look so blue

HDR


1.  International Truck;  Bannack; 10/20/11 4:52 PM; F/9; 1/60; Focal Length 18; Iso 100; Canon t2i
2.  Menacing Skies;  Bannack; 10/20/11 4:45 PM; F/4; 1/1250; Focal Length 18; Iso 100; Canon t2i


HDR is something that I played with before but wasn't sure if  liked it.  But after using photomatix and dynamic photo I'm starting to like HDR.  It just makes the color of the images pop.

Macro Abstract


Blend; Bannack; 10/20/11; F/5; 1/40; Focal Length 39; Iso 200, Canon t2i

So I just used the overlay option to blend these two images together to get more of grainy old school look.  I didn't edit either image just blended them together.

Reverse Depth of Field


1.  Foreground; Bannack; 10/20/11 1:20 PM, F/5; 1/40; Focal Length 40; Iso 100, Canon t2i
2.  Background; Bannack; 10/20/11 1:20 PM, F/5; 1/40; Focal Length 40; Iso 100, Canon t2i

Not much to these ones.  No editing done.  And to get the different depths of field I just used manual focus to shift my focus from the foreground to the background.

Action Blur and Freeze


1.  Ghost Door; Bannack; 10/20/11 1:34 PM; F/22; 8 secs; Focal Length 53; Iso 100 Canon t2i; shutter release remote, polarizer filter, tripod
2.  Jump for joy; Bannack; 10/20/11 1:25 PM; F/6.3; 1/320; Focal Length 35; Iso 100 Canon t2i

The ghost door image was a fun one to do.  I used my shutter release cable, and my polarizer filter to make it darker.  I put my camera on the tripod, set my shutter speed and hit the shutter button, ran to the door and closed and opened it.  And the freeze action picture I just used a face shutter speed to get the frozen action effect.

Portraits


1.  Cassie; Bannack; 10/20/11/ 1:16 PM; F/5; 1/40; Focal Length 40; Iso 100; Canon T2i
2.  Jenni; Bannack; 10/20/11 4:58 PM;  F/4; 1/40; Focal Length 24; Iso 200; Canon T2i

So I usually don't like shooting portraits too much, but at Bannack I tried to take more portraits than I would usually.  I always wanted to shoot a portraits like the one I shot of Cassie.  I shot it using side lighting from a window and she was just standing in a room with a really dark background.  The shot of Jenni turn out well I think.  I shot multiple portraits of her.  This is a shot that came right out of my camera.  The only thing that I did to it was slightly air brush her face so that her skin tone was a little more even.

Sunday, October 16, 2011

Enhancements


1.  Airbrush/Spot Heal \ Rexburg \ 10/13/11 \ 4:35 PM \ F 8 \ 1/125 \ Canon t2i
2. Replace Color  \ Rexburg \ 10/13/11 \ 4:30 PM \  F 8 \ 1/125 \ Canon t2i
3. Match Color  \ Rexburg \ 10/13/11 \ 4:33 PM \ F 4.5 \ 1/80 \ Canon t2i


On the first image I did removed some blemishes by using the spot healing tool, and I also air brushed his face a little bit to even out his skin tone.  On the second image I tried using the replace color adjustment and it didn't come out well but I tried to find the right image to use this effect for and this is the best I came out with. I work on the for about an hour and it still turned out bad.  I just tried to change the color of the lime green on his hat and watch to a darker green.  And on the last image I just used the match color to make this image a little more lively.  It made the image more vibrate and I really like the effect the image had. I will be using the match color on more of my images, but in a less flashy way.

Portraits


1. Life of a photographer \ Provo \ 10/8/2011 1:24 PM \ F 5.6 \ 1/500 \ Telephoto lens \ Canon t2i
2. Full body \ Rexburg \ 10/13/2011 4:15 PM \ F 4.5 \ 1/80 \ Canon t2i
3. Candid play \ West Valley \ 10/8/2011 4:32 PM \ F 4.5 \ 1/60 \ Canon t2i
4. Head and Shoulder \ Rexburg \ 10/13/2011 4:50 PM \ F 8 \ 1/125 \ Canon t2i
5. Posed \ Rexburg \ 10/13/2011 3:14 PM \ F 7.1 \ 1/80 \ Canon t2i
6. Side \ Rexburg \ 10/13/2011 4:45 PM \ F 8 \ 1/125 \ Canon t2i

So I wanted to take a array of different pictures and not use the same subject over and over again.  I think my biggest issue that I have with taking portraits is remember that I need to really watch was my aperture is.  Because at time I want to have a blurry background and at time I want to have more in focus so finding the right aperture is key to getting a good portrait.  I think the candid shot was the hardest image to try and get because my little nieces were just running around none stop but I finally found two of them just playing off away from the rest of the group so I just followed them until I could snap a good image.

Sunday, October 9, 2011

Camera Raw Edits


1.  Posing Duck; Provo; 10/2/11; 2:23 pm; f/5; 1/125 sec.; focal length 93; Iso 100; Canon t2i
2.  Baby Sunflower; Provo; 10/2/11; 2:25 pm; f/5.6; 1/160 sec.; focal length 200; Iso 100; Canon t2i

So on these jpegs, I didn't shoot in raw, like a usually do.  So I shot in jpeg and put them into bridge and open them up in camera raw and just sharpened them up a little bit, lighten the flower image a little big in the background and brought out the color of the flower.  With the duck I actually darkened it a little bit and brought out the color of the feathers.

Monday, October 3, 2011

Panoramic Photos


1. Provo Pana; Provo; 4:32 PM; 9/17/11; f6.3; 1/125 sec.; Focal Length 30; Canon T2i
2. Teton Pana; Rexburg; 5:30 PM; 10/3/11; f16; 1/125 sec; Focal Length 33; Canon T2i

So Panoramas are something that I discovered like two months ago and have been trying to do more and more of them.  I just love the way they make me feel, it makes the viewer feel like they are in the image and I love it!  But I took this picture of the Provo temple a couple weeks ago(knowing that we need a panoramic image).  But its a pretty straight forward image I didn't edit it all I did was put the three images into photoshop and then blended them.  And with the image of the teton drive in I just stuck it into photoshop and blended them together and touched up the color a little bit using the adjustment layers(selective color).